Sunday, 6 March 2011
Hello Again! and Re-make three: Retro Skirt
Sorry about the far too long hiatus. There was a really long spell of drab grey days which made any picture taking impossible and then my computer went into coma. It took a turn in intensive care unit aka Elf Husband's hands (how good is it to have a helpful in-house computer nerd?) and is now functioning again, yihaa!
This garment was one of the things I was lucky to rescue from my Grandma's wardrobe. She must have made it in 60's. It was so neatly sewn. I took it for its retro fabric and thought maybe making something out of it as I was convinced that I could not squeeze myself into it. I got inspired later to try to make a skirt by cutting it up in strips. When I tried it on the skirt fitted. It was only far too small over the shoulders, yihaa! I simply cropped the skirt off and sewed the waist and made a couple of darts at the waist to give it form. Time used: 5 minutes or so.
While I was doing this I noticed that the lowest button had had an accident either in the making or using. It was patched, really neatly, so that the pattern matched.
I wore the skirt for half an hour and I had the same accident happening to me, just one button up, where the fabric wasn't reinforced. I could have just given up at this point, but I had realised that I WANTED this skirt.
I then put extra interfacing behind the buttons and used some fabric to enforce the button strip. Next thing to happen? The button holes started ripping. So doing the same on that side too. Now I have a really nice retro skirt and no other bits have given up the ghost. And I like it!
Wednesday, 9 February 2011
Re-take Two and three
I bought a vintage layered cake tin a couple of years ago. I found it in my local treasure trove aka charity shop. In principle I like old and a bit worn out stuff. This tin was yellowish cream coloured and had sage green lid, colour combination which did nothing for my kitchen.
So I decided to something about it. I was thinking of spray painting them, maybe with polka dots. It was a good idea, but it would have been really costly and I could not find the shade of green I had set my mind to.
Lucy in attic24 was doing some decoupage with specially produced paper and I thought that it was the way to go. Again I could not find the green I liked or even pattern I liked in slightly different green. So I decided to go for and white combo. I had a go and the result was this. Not good.
So the tin was a UFO while I was re-grouping. I think that the paper bit is totally oversold thing. They say that it doesn't rip. It did for me.They say it doesn't bleed. It did for me. Or I might be the most sausage fingered crafter on the planet. I was even using their special glue to do the work with. I don't have any evidence, but I think I was taken for a ride with the glue. It smelled and felt like any PVA glue.
In the end I realised that I had the polka dots and the colour in my fabric draws, so that was what I used. Didn't rip or bleed FYI. The lid needed two layers as the green paint was showing through and making the lid considerably different in colour. (It still shows a bity, especially in the picture, less so in person)
The only problem is that the tin was quite tight to open to begin with. To stuff a bit of fabric in between doesn't help. We will see what happens. Maybe I should have given it just sandpapering a la Jokke from Jokkemaa. I like the colour though!
My IKEA chandelier with self-hung beads had lost some of its jewels.You can see it here in its former glory. I replaced them, as I cannot find the container in which I put the ones that had fallen off and added a few more beads and colours for fun.
PS. In pictures you can see how there are some air bubbles left, because my decoupage work was not perfect. It actually shows far less in real life, the pictures really bring them up.
Tuesday, 8 February 2011
Re-take One
Sometimes my projects are fine to begin with, but then there is a problem as time goes, sometimes its just the usage the things get. I have had a few things needing re-doing in my kitchen and lately the issue has bothered me as much as to propel me into action. Remember my kitchen sweeties aka cabinet knobs? I blogged about them here. I used varnish, which seemed ok, smelled ok and brushed on ok. I did not heed my doubts about using a product which has travelled with me from country to country even shifted continents a couple of times. And actually, when I started to think about it, I know which project I bought it for and when. And hmmm...it was 15 years ago!
So the varnish started to get glue like and got gunky and unattractively dirty. I have now re-painted them and re-varnished with new varnish.
First time around I kept the colours slightly muted for the most.
I noticed though that I liked the bright ones best. I think I was a bit worried to make them too bright, but the amount of the colour is negotiable in the sea of white cupboards, tiles and walls. So this time around I have used brighter shades. Very Happy with the result : )
Saturday, 5 February 2011
What can You Get for 50 pence?
A bunch of colourful dishcloths in cotton! I bought a toddler's hoodie knit in the local charity shop, cut it in pieces and sew it them together in dishcloth sized pieces.
This is one of those obvious things I hadn't thought of before I saw this done in Jokkemaa. I had before read about using your old t-shirts as dishcloths, but I am ridiculously attached to my "knitted" shop bought ones. So this is the obvious solution. I get cheaper, recycled dishcloths and as a bonus they are in pretty colours. Jokke's are far prettier than mine. Even if you don't understand the language, it's a good place to go and get some inspiration, the pictures are worth it, Jokke is extremely productive and creative crafter.
And as a bonus for this production I got a cute zip as well!

Heart hair clips were made for my friend's littele girls. Very simple, very cheap, well under 50p a pair...
Friday, 28 January 2011
She Sells Sea Shells on a Sea Shore
Well I don't really. But I do like sea shells and spotted this idea how to display my collection in a interior decoration magazine or website. Not a faintest memory where. In my memory their version was more "polished".
These shells were largely collected during my morning walks along our home beach in Mbezi Beach in Dar es Salaam some years ago. There are also shells and sea glass from Northumbrian sandy beaches.(That's where we live now, just to make sure that you don't think that it has started to snow on the shores of Indian Ocean).
There is also a pretty quarts from Alpujarras in Spain where we lived a short while:
It also contains a very special shell, which my husband found for me on Zanzibar Stonetown beach after the day we had met there. It looks like a Flamenco dancer's dress.
I might add that I do like old used things and anything having a lot of departments. After a long rumination period I decided to give in and glue my shells into the typesetters tray. My inclination was to stick them with blue tack or something, but Elf husband rightly pointed out that they won't hold and lots harrumphing would ensue if I followed that route and the shells started falling like leaves in the autumn. The upper ledge, which has originally been the draw front was given a light sanding as I didn't fancy the yellowish cream colour of it. I left some paint behind, my take on "shabby chic".
I love the little metal corners holding the slots in place. The whole thing has an air of an old zoological museum, in a good way; the old wooden draw, things sorted in there and slightly dusty looks. It reminds me of school store rooms, where one had a rare access with a teacher. One of the first schools I worked as a teacher had still some store rooms like that and they still made my tummy flutter in excitement.
For anyone worried about marine conservation, I should add that all the shells and the coral were washed up on beaches and empty/dead, no live organisms were touched.
PS. I will post a picture of this on the wall when we get our act together.
Sunday, 23 January 2011
Elf Mama's New Favourite Hand Bag
This is a bag I have been planning during the nights I haven't been able to sleep, not that there are many of them. The colour of the bag in the picture is far too blue, it is in fact teal coloured. I wanted to make something like this since Elf husband bought me this purse, which I love very much.
I love the big bobbles closing the purse, so wanted to have them in my bag too. In this picture you can see the true colour of the bag as well.
I just didn't have a clue how to attach the frames to the sewn bag. I tried to study each frame I had at home, but became none the wiser. Then I found my Bag Hero, Lisa Lam of Bag Bible fame. The instructions are not actually in the book, but on her shop web-site here. The outer fabric is remnants from my teal jacket I blogged about here.
I used nice wild "Emmaline" quilting weight cotton for the lining. This is the other bag I made a pattern and a muslin for, amazing in my mind.
I like the metal clips which attach the strap to the bag. I had also purchased a chain, but decided that I liked a strap in the bag's own fabric better.
Now that it is all sewn and clued it will get a lot of outings! (Sorry about the blog turning into a bag blog lately. I promise to do other things as well!)
The fact that the bag widens in the bottom and seems to be able to room an awful lot for a little bag makes me think of Hermione's handbag in the latest Harry Potter film.
Saturday, 22 January 2011
Sewing Jersey and other Stretchy Stuff
My birthday present has arrived! Of course there were several days when I did not have time to acquaintance myself with my new overlocker. My lovely husband and dad gave me my new toy.
I was really lucky, because trawling the net the price seemed to sit £50 under RRP everywhere. Then Elf Husband spotted a place with a further £50 reduction, because they were selling the display model. Hurrah! We did the purchasing in the New Year's weekend and got a phone call later in the week that unfortunately they had sold that display model, but if I could wait for their next stock delivery, they would give me a brand new one for the price, which I said "Yes Please" to.
I have never ever used an overlocker before, so everything is rather new and scary. I am getting a grip with it now, but I have a lot to learn.
The first project I decided to do was making a fleece for Elf son from my old fleece. I thought that even if it goes horribly wrong, I won't feel too bad as it is an old garment I never use. Elf son's favourite colour is red and he needs a new fleece, so that is how this project came to.
I had all sorts of "aha" moments. Many overlockers, mine included have a cutting knife to tidy up the edge you are sewing. In my model you can choose not to use it and indeed some stitches don't use it at all. For some odd reason I felt that the knife was preventing me to see what was happening there with the material and the needles and everything, so I whipped it up. (Being used to sewing machines I sort of needed the visual control, which you don't get with an overlocker). The picture is taken from the side, but if you imagine being on the front of the big white safety barrier and the rest of it...
At the same time my edge I was sewing wasn't perfectly cut and straight. I can tell you that the overlocker didn't like this. It got all muddled and then snapped a needle. I managed to snap one more by pulling the material, which is a no-no with an overlocker. In addition there is double the amount of thread tensions to consider and of course the same with correct threading.
I then proceeded to make a stripy long sleeved t-shirt for Elf son. I got the material from "marimekko" factory outlet in Helsinki when they had their great sale in last August. I was very lucky to find a big piece and could not have bought bad quality jersey for that price other places. It's not that important for me that it is marimekko fabric, but Elf son likes stripes and jerseys from marimekko wash really well, so I felt it was a brilliant find.
New favourite accessory for the normal sewing machine has been found due to this project: The twin needle. Hemming the sleeves and the hem the twin needle is lovely and pleasingly neat. I was using it also for the neck opening with the stretch stitch. At least in the hem and the sleeves the needed stretch is already there in the normal twin needle stitch, so it was quick and neat to sew. I am pondering now whether to cut out the neck opening strip and redo it with a normal twin needle top stitch...
Knits have been long on my list of "would like to do", but the slowness of the process when using a normal machine has put me off. Now I can run some stretchy seams with a steaming speed! The only speed hampering thing is that the knits of this type definitely need pinning before sewing, so I can see that the seam matches. It is totally impossible to tell as it rolls like mad. Even ironing won't stop it. (Believe me I tried. I do anything before I pin or horror of horrors stay stitch anything).
I must also say here that if you are thinking of buying an overlocker, because you already own a passable sewing machine, I would urge you to think again. As wonderful as it is to be able to do overlocking, you still need a sewing machine and a good one of those is such a fantastic thing to have and makes one's sewing really a lot easier. Of course you can get much swisher overlockers than mine and I am sure that they are equally "easier". (Not that mine is difficult at all). I am so happy that I chose first to upgrade my sewing machine, before getting an overlocker, but then majority of my sewing isn't knits. (As you might have guessed, I was actually thinking of first getting an overlocker as I had a machine...)
Wednesday, 19 January 2011
Hannele Bag
I am on the roll with bags. It is really good fun to make them, now that I have learnt a few basic principles. This is totally my own design. The hotch-potch sewer, yours truly, has made first muslin in her life! Not for garments, oh no, but for bags. I actually started another bag before this and will show it as soon as it is finished.
This bag was in my mind a long time. I had made the first sketches last September, and now it is here. The bag changed slightly under the process, but for me that is normal.
A pattern and notes of everything needed for this bag was made, should I want to sew another one. That is something to celebrate in my book.
I was debating about the closure for this bag quite a while. I am all for closures, which keep contents safe, so was quite intent to put a zip on it. In the end I decided not to, but went for a magnetic snap.
It keeps the contents in quite ok, as the bag is not that deep. I also made the bag to be carried under the arm, which closes it even more. As I am all for versatility, I made the strap with adjustment, so I could carry it across my body as well.
Inside I have open pockets on one side:
and a zip pocket on the other.
I am not entirely sure, how wise this was as the bag is constructed with pleats. They seem to be ok, but I just might change this too. In general I am very fond of pockets in bags as I don't like hand-bag-soup where all the items are swimming in a merry mess.
All in all I am well pleased with my efforts. Now it only remains to decide whether to keep or sell this bag...
Sunday, 16 January 2011
More Hooting from the Owlery
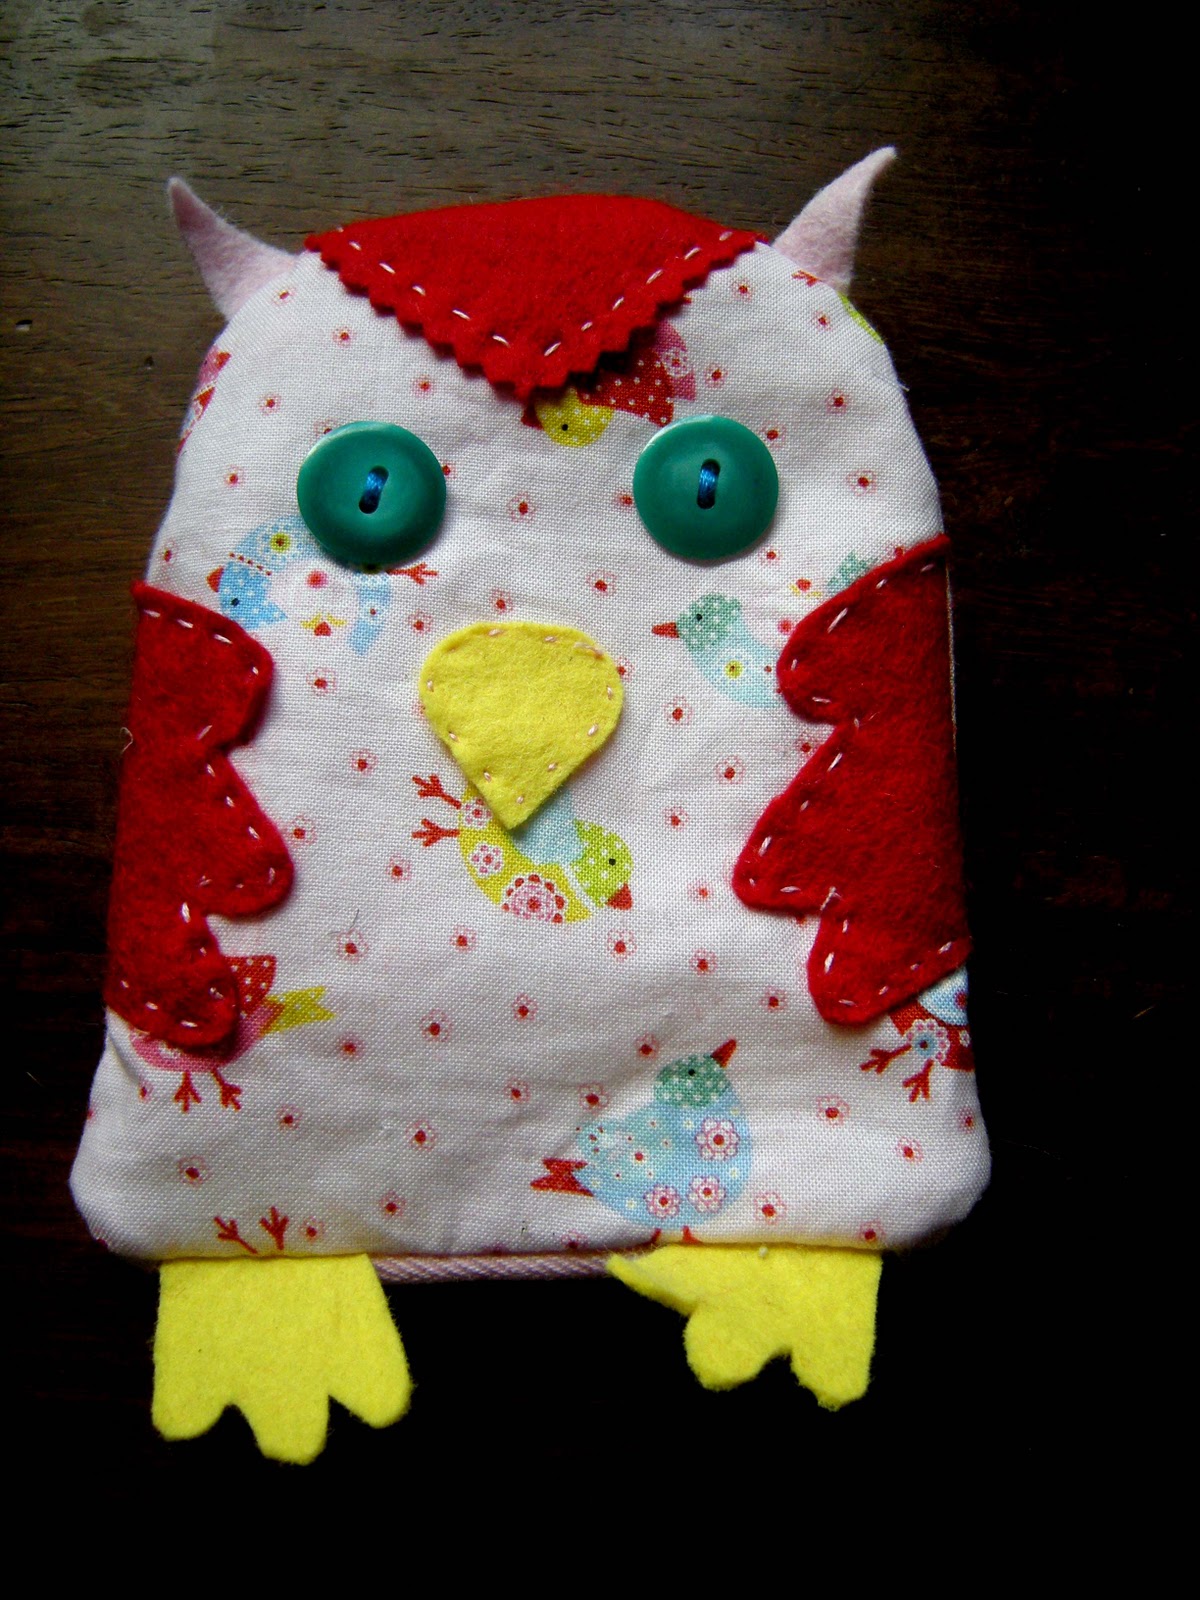
When I finished the first owl purse, I just could not stop before I had tried a few of the variations in my head.
This is the original guy:
Here is his girlfriend:
Then the stripy one with running stitches on the felt bits:
The green one with endearingly wonky "ears":
The Mustard coloured guy with wise expression:
and a row of owl bottoms: (just cannot resist...)
This has inspired me to think again about opening a little shop for my "overflow". Sometimes the inspiration is larger than my cupboards and a little help for material costs would not be bad either. I designed the banner for the shop this morning, but it also needs making. I want to do it in embroidery and applique, so it won't be here today...Well, there is no hurry for the shop opening, is there?
Thursday, 13 January 2011
Money Wise aka Owl Purse
Well...I was supposed to do some supply teaching today, but Elf son has gone down with temperature and is only interested in listening to stories either read for him or from a CD or films. As I did a whole lot of reading already, he is now enjoying a Star Wars film or two and I am having sudden unscheduled time for crafting; BRILLIANT!
I am possibly really late to this trend, but I do adore owls and as I was thinking of doing something from my own head, I settled for trying to make an owl purse.I know that those buttons look mucky. It's dust and I will take a cotton bud to them. I just could not be bothered to take another picture. You can see that the buttons are from a granny tin in this way!
I might be the only one wanting to have an owl purse, although my thought was trying to develop something I might be able to sell on craft fairs. There are several variations in my head, so friends and family, you are now warned that you might be gifted with these, if they don't sell. (In case I actually produce a stack of them).Watch this space, the variations might fly this way soon...woo hooo!
The purse is zipped along the owls bottom. I won't entertain you with several childish jokes that ran through my head making this opening.
Here is the owl in its entire glory:
I think it would have looked even better had I hand stitched the wings and the forehead bit with embroidery floss. Next time...Have a hooting weekend! Edit: Have a hooting Thursday. Being suddenly at home doing cosy things has thrown my sense of time...
Subscribe to:
Posts (Atom)