Showing posts with label renovation. Show all posts

Tuesday, 27 January 2015

Birthday project aka painted toilet door

I went slightly mad with my birthday project, but let me start from the beginning.


This is where it all begun...


Our back entrance&toilet is our personal Siberia and this door doesn't help. It needed an insulating strip around and curtain to hang for some extra cosiness. The mark on the wall is from a rack of clothes hooks I had already removed before I took the picture. I bought the fabric over the Christmas holidays, but was not prepared to hang it before this little entrance had been prettified a bit. For the first a curtain and a rack of hooks behind the opening door would have meant that squeezing out would have become difficult. I also hated the said hooks; they were there when we moved in, attached to an untreated piece of wood, aluminium school hooks, yuk.

So as I had my birthday a while ago I decided to use it to start my project. I painted the walls and the toilet door. Initially, I had no notion of painting the outer door's inside, but seeing it there amongst all the freshly painted surfaces, I had to. It was simply too ugly to be left alone.

(The pictures are not great, but I have been hanging on for yonks now, because the light here haven't really cooperated for picture taking, so now you have to do with what I have been able to snap)

So here it is before from all the angles, from outside:

The toilet door:


It is a really small space and it felt very forlorn and dirty and uncared for before.

Now that the outer door is painted and curtain hung it looks like this:

As I mentioned on my Facebook status under the decoration work; a coat of white paint can improve almost anything!
On my trip to IKEA to buy the curtain material I also spotted a perfect rack for all my bags I want to hang here...


I shifted the rack away from the door and it is perfect where it is!

I then proceeded to decorate the toilet door. This is the upper portion:


and this is the lower:


Here is the view from our kitchen:


Makes me smile every time I see it! Have you done anything mad like this at your home?

PS. This post is linked to Homemade Mondays "Linky Party " on Frugal by Choice Cheap by Necessity. Have a look at a lot of frugal/creative people's posts there.

Saturday, 24 May 2014

Extra TA-DAH for bathroom

We managed to hang the blind today and I decorated the window sill with a jar with shells.


So now we are really finished with the bathroom!

Bathroom Remake Ta-Dah!

 TA-DAH! Here it is. The bathroom. We used all the two weeks of our Easter Holidays to get it functioning and a bit of time each side of the holidays to prepare and do the last little bits. This was not a simple cosmetic revamp, but a total "rip everything out and put it back again" -job. And what's more, it was redoing bits that had been done badly. We had few hitches, but it was a learning experience and we now have a lovely working bathroom.

We did it in MOMO spirit - Modest Modern. Partly because we had a modest budget, but also because we did not feel that a full blown "luxury hotel suite"-style would have suited the house. Ours is a modest Victorian terrace and we wanted the bathroom to mirror it.

                      BEFORE                                                  

                     AFTER
 
The toilet has been changed to a normal, traditional white one instead of hugely wide beige throne. This has made cleaning around that corner easier, it was a really annoying job before.The little radiator with a towel rail above has been removed and replaced by heated ladder style radiator-towel rail. The walls are now white rather than magnolia-cream-something. The floor is essentially the same colour, although even the "before" floor was installed by us as an emergency measure instead of a smelly carpet.

                                                     BEFORE                                                                                                                       
   
                      AFTER
The bath was changed from a beige plastic monster to a plain white enamelled bath. The screen is now a folding one, which makes climbing into bath/shower easier. Before we practically had to stand in the toilet to make it. The mixed tiling was changed to one style, sand beige-grey big tiles and we did tile whole of the bath area.
Again the cleaning is SO much easier because I don't have to have my heart in the mouth while the screen is hanging outside the bath or banging against my legs and bottom in order to access the shower end of the bath. The old screen was actually not intact either and it was hanging wonkily. I had all sorts of ideas of having some natural pebble tiles, but realised that the amount of grout would mean that the cleaning would be a nightmare. Although the look might have been nice, I want to my everyday life be easy and simple.

                     BEFORE
                                                                 

                     AFTER  
 
The sink area was very dark and was fitted with a sink with a gap of 2mm between the sink and the wall. Why is that important? Well it's big enough to have muck gathering, but nigh impossible to clean. I leave the result for your imagination. The mirror was ok as such, but I was desperate to have space for all the tooth brushing stuff and such easily accessible, but hidden, so we bought a cabinet. I am now hopeful for the sink area to keep tidy. you can also see the patterned tiles in action. They are slightly lighter coloured in reality.


I bought a metal soap holder for the wall, but in the end didn't like how it fitted into the space. The walls surrounding the sink make it a bit tricky to dress this corner.At least we have a light fitting above the mirror cabinet. The soap dish was something I had already in the house. I filled it with some smooth pebbles, so the soap keeps dry. It works and looks nice.

                     BEFORE                                                                  


                     AFTER

The stand under the sink had a cupboard with two doors and a shelf. One of the doors actually came off, because the cabinet had been soaked due to the leak inside the wall. When I removed it, I also found a mushroom growing out of the cabinet wall. Charming! As the bathroom is narrow, I wanted draws under the sink to maximise the utilised space. IKEA had the most reasonably priced units. I was totally amazed what some firms were asking for similar cabinets. And no, the materials were no better... I also like that the sink is just a part of the moulded top. It makes it easy to clean. You should think I am obsessive about cleaning, but actually I don't like it, so anything which makes it easier/quicker is good in my book.

                     BEFORE                                                                       
 
 
                               AFTER


The old shower looks unusable in the picture, but in the reality, we had just taken the head off to use with our emergency shower arrangement. Our "luxury" was to buy a new shower with a nice big head and a separate hand shower utility. The only bad thing about it is that it is too good. Eh?!? We stand far too long under it as it is so lovely! We also have bath taps in the same end, so when in bath, nothing drips on your head. The bath taps are a modern take of Victorian taps, again very plain style. The good thing about them is that they are easily turned with toes.

If you peek on the right of the picture above, you can see that the door glass is covered by a blind inside. It was an ok idea, but I found the blind looking really out of place, heavy and big on the door, so did not want to replace it with a new one. Instead I went for a granny option; a curtain wire and a curtain made of a lovely vintage table cloth. I am so happy to have found use for this piece of loveliness in my house. It looks sweet from both in and outside. This is how it looks from the hallway, coming up the stairs:


Yes, the hallway and the stairs are our next project. As this is my favourite door at the moment I need to show you the effect closer by:


I love it! It's like a fine old lady and makes me smile every time I see it.

Well done if you made it to the end of my bathroom report. Anyone else having a show and tell of bathrooms? Leave a link if you have, I would love to see!

Wednesday, 7 May 2014

Painting Naturally

Helloooo! After having disappeared into a plughole I then metamorphosed into a mole to dig the allotment. It looks far better now, although I am still behind and need every minute of the day to run the house/work/decorate/garden. Cleaning and such has to wait, I hope my family won't find this too disgusting.

 In our renovation, we have aimed at using the environmentally and human friendly paints and surface treatments where possible. In my latest foray on the net I have found even more manufacturers. My focus has been partially on the care I want to give us, living in the indoor climate we create and partly on the manufacturing in this country. So, my list is again quite UK biased, with a good reason behind it.

In the latter years the EU has tightened the VOC (volatile Organic Compounds) rules for the paints. This has lead to an improvement on this account of many mainstream brands. It's not by any means the only thing , which counts. Many of the big makes market their paints as "green" although I would look closer, before I believe.

Also a paint manufacturer, who might use linseed oil in the paint, would actually rack up some VOC count. So everything is not as plain as it seems. There are a lot of other factors, which I am not going to go into, but will tell you what my experiences are. There is an excellent article about the ins and outs with a list of manufacturers and suppliers here.

We used "Nature Paints" for our walls last summer. They come in powder form and are clay based, tinted with the finest colour tints available. They are relatively easy to use and it is delightful that the component, which is easily available ie. water has been left for the user to add. The production of the paints is located 20 miles from the clay pit, where the main ingredient comes from.


Like the blurp says: You can sleep immediately after painting in the room, you could sleep while painting, if you wish. This is a paint, which you could smear on the walls without a twinge for your soul while your baby was napping in the same room.

This paint does not need a primer and can be used on wood as well. We painted a newly plastered living room with this  and had to use 2-3 coats. I think we could have done with only two, had I not allowed the Husband to paint! Anyway, the paint wasn't just sucked into the fresh plaster, which I have heard can be a problem. (It could also be the skill of our plasterer, he left the surface just right, polished enough for not being thirsty, but not so polished that paint wouldn't hang there). EDIT: I have now used it in a wall I plastered, very amateurishly, and it still doesn't so the disappearance act.

Cons: Well, it takes some effort to mix it. If you buy one of those mixing bits for your drill, you should be laughing. I made do with a hand mixer from my kitchen. Totally doable, just a bit slower. You have to use the paint you have mixed in a week. It does not have any preservatives, so will go off. On the other hand the extra powder is easy to store. Again no water, no trouble. Also the paint has a clay smell. It takes some time to disappear. It is not unpleasant, just earthy.

When it has been painted and has cured for two weeks, it is hard to tell any difference to a bog standard emulsion. (Actually could not tell after the painting either). I would hazard a guess that an emulsion could withstand more rubbing with an abrasive sponge, but I have removed stains from our walls without a problem. (And equally had paint come off, when a wall was painted with a "normal" kitchen emulsion).  I would definitely recommend this brand.

For our bathroom I chose another excellent British paint called Ecos. They have a largish selection of colours and can even colour match for you, if you wish. Their selection includes both normal emulsions, bathroom and kitchen eggshell, wood paint and outside wood treatment products. (And many more). Their website is well worth visiting.


I found that their printed colour chart was more accurate than Nature Paint's. Both places send tester pots/envelopes and I always use this service as it is difficult really to see how the colour will work before you have tried it in situ. Nature paint also allows you three paint chips with every order. They are bits of card with the actual paint on them, so as accurate colour rendition as you would get.


The paint was like any other paint to work with, maybe a bit easier, as it is not as thick as some of the modern paints. The 5-litre pot comes with a fastening ring, so no need for screwdrivers to open the lid. Oh, there was one difference; it does not smell. At. All. BLISS! Another after-thought here: The smell is no indicator for the harmfulness of the paint; a paint can be odourless, but still fill the air with harmful chemicals. Likewise an eco-paint can be smelly, but won't harm you. All three of us are quite smell sensitive, so Ecos Paint being odourless was a great bonus.


Friday, 4 April 2014

Bathroom renovation day -1

We start officially tomorrow, but actually have done some preparatory stuff during this week.
This is how our delightful bathroom looked like:


Yes, there is a hole in the wall. We had to make it to investigate a leakage. This then led to stopping water going into our shower as the water was leaking inside the wall. The construction of this wall could be an example in a book of "How not to renovate your bathroom".

Husband took the shower screen and the wall down. (We will install new ones, the lay-out is the only possible for this room, if we want to have a shower and the bath.


Today he also peeled all the tiles off. We will have our last "splush" in this bath tomorrow morning and then all the sanitaryware is taken out.

We got most of the deliveries yesterday, but the sink area tiles arrived this morning. They are SO pretty. I had to play a little bit by making a pattern:


I love them, so excited to have them on my walls. I will try to keep blogging, but if there is a bit of a pause, I have temporarily disappeared into a plughole.

Friday, 28 March 2014

White wardrobes, printing corner and a bit about paints


Yesterday evening I came home from my yoga class to the news of Elf Son having chicken pox. He has managed this suitably for his birthday weekend. Maybe he takes after me...I had it even older and to my birthday too! At fourteen the experience was mind-blowing for all the wrong reasons, but  at least I am in no doubt that I have had it!

Our bog-standard fitted wardrobes from IKEA from our last house were brown and not very nice brown at that. We decided to take them with us, as buying new ones would have meant a big dent into our small budget. To make them nicer to look at, I decided to paint them white. For this job I chose "Annie Sloane" paint. It is a chalk paint and comes in various colours. Mine is "old white".  The good thing about this paint is that it does not have any nasties in it. It does not stink and as a bonus you do not need to sand or prime otherwise the object you are going to paint. The downside? Well, you have to wax and polish it to make the surface withstand usage. There are a lot of different layering techniques too, to make the result to look "shabby chic". As I was not that interested in the effect, I just used a good synthetic brush to get quite even result.

The result is by no means even, if you compare to a "normal" wood paint. I like it as it is, so everything is fine. I also used it in the outside of our shoe rack. If you want to repaint, you do not need to take the wax away, just paint over it.

This is the "missing corner" I did not show from our bedroom. The trolley has our two printers and a scanner and place to put a laptop on. It is a really useful feature as it means that we don't need to have these space hoggers on our desks. You can see my "printer cover tablecloth" on the lower shelf.


My visitors mentioned that the bedroom did not look nearly as big in the pictures as it is in reality. I must make a series of pictures, which showcases the floorspace.

Do you have favourite "natural" paints? I would like to hear, since the doing-up our house is not even nearly done and I am always on a look-out for good products. I have a post brewing about ur experiences with paints and floor treatments. Watch this space.

Monday, 24 March 2014

Pondering about the bathroom

This morning felt crispy when I set my foot in our back yard. The drinking water for birds had been frozen overnight. Nothing at all unusual for this time of the year. The surprising bit came when I heard in the weather forecast that the night had been one of the coldest of this winter. That says a lot about how mild this winter has been.

We knew from the word go, that the bathroom in this house needed doing. I was all for having it done before we moved in, but the best laid plans and budgets and so on...

The renovation is going to happen over the Easter holidays as we are staying at home and can be smelly without assaulting other people's sensibilities. The plan has always been to replace the odd beige coloured suite with a basic white one. Nothing fancy as such, easy to change colours and styles around it and it does not date that easily.

We (or rather I ) have been pouring over the selections of tiles, being mindful of both the budget and longevity. I ordered some samples:


They were all pretty, but it is funny how in situ the tile I least expected to choose was the best one. It is actually huge and could not fit the picture above.


As we both liked this one best, I started to work on the additional tiles I wanted for the sink area and the vinyl for the floor. This is what we decided:


The greyish background is the big tile for the bath/shower area. The patterned one is for surrounding the sink with.  It is a part of a "patchwork", so there will be a selection of six different patterns in the same colour. The dark piece is the vinyl for the floor and the white paper is there to represent the white sanitary ware. I am starting to get excited about this!

I tried to be smart with the picture, arranging the colours in their respective quotas. It didn't quite work. The walls will be white as well, so the dark vinyl and grey tile should cover approximately the same with lots of white.  The patterned one will be a drop in the ocean.

I admit that I despair with the amount of necessary, but "invisible" stuff we need to buy; the aquapanels to make the stud wall, the pipes and screws and such. We are doing this on a little budget, but I would not call it cheap...

Friday, 6 December 2013

We have come this far in the Nest


I have had numerous requests from our friends and family about photos of our house. I thought that I would be able to do a lot of "before" and "after" posts, but nothing seems to be ready for the "after". On the other hand, we are now, at this moment, at the point where I feel that I can actually get to clean the house without having to ignore move a lot of stuff on my way. The house is not "done" and I have very little light here at the moment, so when something like a sun ray actually shows itself I have been running around the house with the camera to satisfy all the requests. This means that there is no time for posing aka putting away stuff, which just happens to be there. You won't get nice styled pictures, but a family album.

I might make a series of more oh-lala pictures later, when circumstances allow, but just now, this is the Nest, warts and all in dim winter light, which affects the picture quality:

Let's start upstairs. I have shown my work corner before, but here is a bit  more context to it. Before we started it was an ok room, but with carpet and I just don't like them!


We decided to paint the floorboards upstairs and this is the same place after the painting was done, although the door is now also painted white. Before the furniture went in, it felt as if we might need sun glasses to avoid snow blindness when the sun shone.


And with all the stuff:


On the left side of the bed is the husband's desk:


My old lady corner of the room (very brown in the midst of all white and colours).


There is still a view to show, but that will come later, as seeing anything to that direction is not possible, unless you are interested in piles of bags and stacks of artwork, which has not been hung as yet. I realise that non of the pictures show the magnificent floor space left around the furniture. That will come later.

The Elf Son's bedroom had the least work done; just the floor and the skirting boards. The one blue wall was there and he liked it. I think of the colour as "Cornish Blue on Speed". In real life it is not quite as eye poppingly bright as it looks in this picture taken with a flash. 

His bed is sticking out into the room, which has helped the bed-making efforts. I don't know why I took the picture from this odd angle and not from the door. Maybe to hide the shelves with unidentified stuff...If they were flying, I would have UFOs in my house.


This is his desk in normal state of mess. He would probably say in "mid-work".


The stairs to downstairs and the front entrance. Yes, mad to show, but this happens to be one of my favourite bits of the house. Even when we were just working on the house and everything was covered in dust and there was the ugly curtain and institutional vertical blinds you can see hanging here, this was a lovely spot. I used to sit on the stairs and have my cup of tea dreaming of the day when it would look even nicer.


 It is nicer now, although not finished.


See that weird UFO shape (is there a theme building up here?) behind the glass above the door. It is the most horrible house number plaque on the earth. It will go.

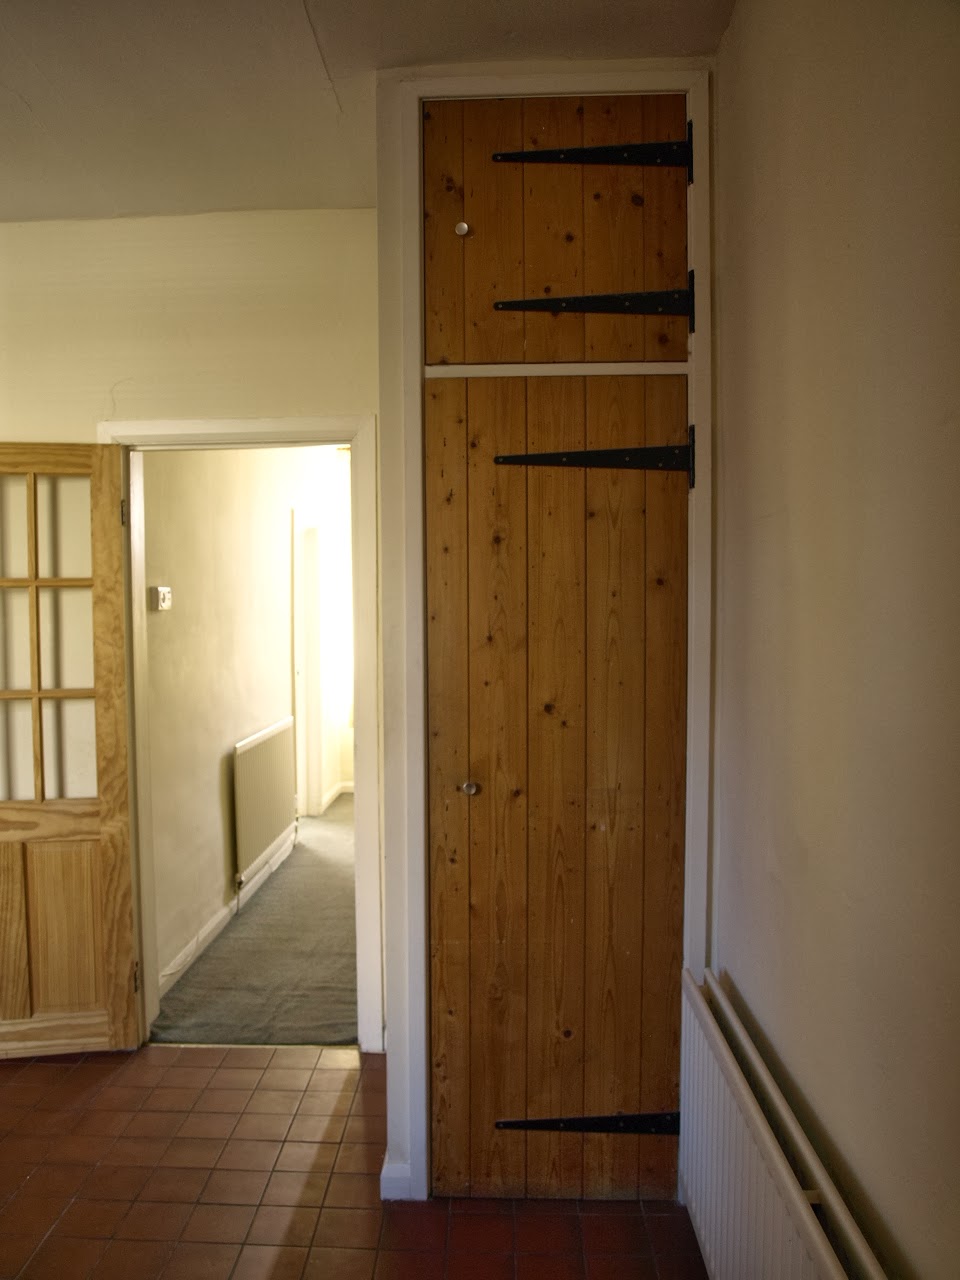
Under the stairs is one of the most crucial bits of the house; place to put our shoes into. The fact that we walk only that far with our shoes on, makes keeping of the house clean easier. And who hasn't had the problem of tumbling shoe mountains in the entrance? The shelf hasn't been painted as yet, but I'll show it to you anyway. I also managed to take a picture having some cable trunking standing in the corner etc.etc.


The living room is rather different looking from what it was. Here it is pre-purchase:


And this is how the same corner looks today:

 
Art above the sofa is still missing, I am working on it. The chest of drawers, which you can partly see in the picture is here (and all the hi-fi and telly stuff, ugh).


The opposite wall looked like this.


 It is amazing how much a coat of paint and a new handle can improve a cheap pine door. (You get just a peek at it)


This is the window wall/corner towards the hallway:


At the moment and as long as we don't have a mantle shelf, there is  very little place to have any trinkets, so the window sill has to work hard:


The kitchen has had the least work done together with the bathroom. At some point when our finances allow, we will re-do the kitchen, but until then we have opted to make it as functional as possible with what we had. It has led to a merry collection of different styles, but hey-ho, who cares. One thing is sure; I never dreamt of having a kitchen of this size. It is about 3.75mx6m, so reminds me of a farmhouse kitchen.

This is a picture gives you an idea of the kitchen when it was empty:


The wall behind my back had a loooong radiator and this cupboard in the corner. Total waste of space from the orientation point of view.(So we took it down and exchanged the radiator to a vertical one).


Now this wall is my "food wall"


No. I don't have jellyfish on my radiator, but do wash and re-use freezer bags we use for bread.

The window wall looks rather a lot like before. The odd placement of the picture has an explanation. Behind it lives the extractor fan.  When I am using it (the fan, not the picture), I take the picture down. There is something slightly wrong with the fan or it might just be a very old model, but in the winter time with certain wind there is a breeze through it in our kitchen. The picture functions as a wind shield. Aah, and there are the shelves, which form our coffee and tea station. Important in our household!


The last wall, which was essentially just a wall looks most like "us" as we used our old furniture on it.


So that was The Grand Tour of the Nest! With time there will be more, but at the moment we are looking forward to a Christmas break in a few weeks with doing nothing but eating good food, reading a lot, seeing films, meeting friends and being together. My crafting has been on the back burner as well, so I have decided to be merciful with myself allowing this to be a year without any Christmas gift making. I will be back in action though, my fingers itch!