Tuesday, 17 June 2014

Busy Bee

I have been, lalalaaaa! I haven't forgotten you and my blog though. What I have been doing hasn't been awfully photogenic or just haven't had the camera with me. So this post is an odd cocktail of everything and nothing... In no specific order:

  • I have been making birthday cards and gifts...cannot show as yet, but here are couple of peeks at how they looked while I was working:


 Notice the old enamelled Chinese pot. I love it as my desk tidy while I am sewing. The red creamer is for water I put into my iron. Rest will be revealed in the near future.

Another pressie under the construction...totally different colour scheme.


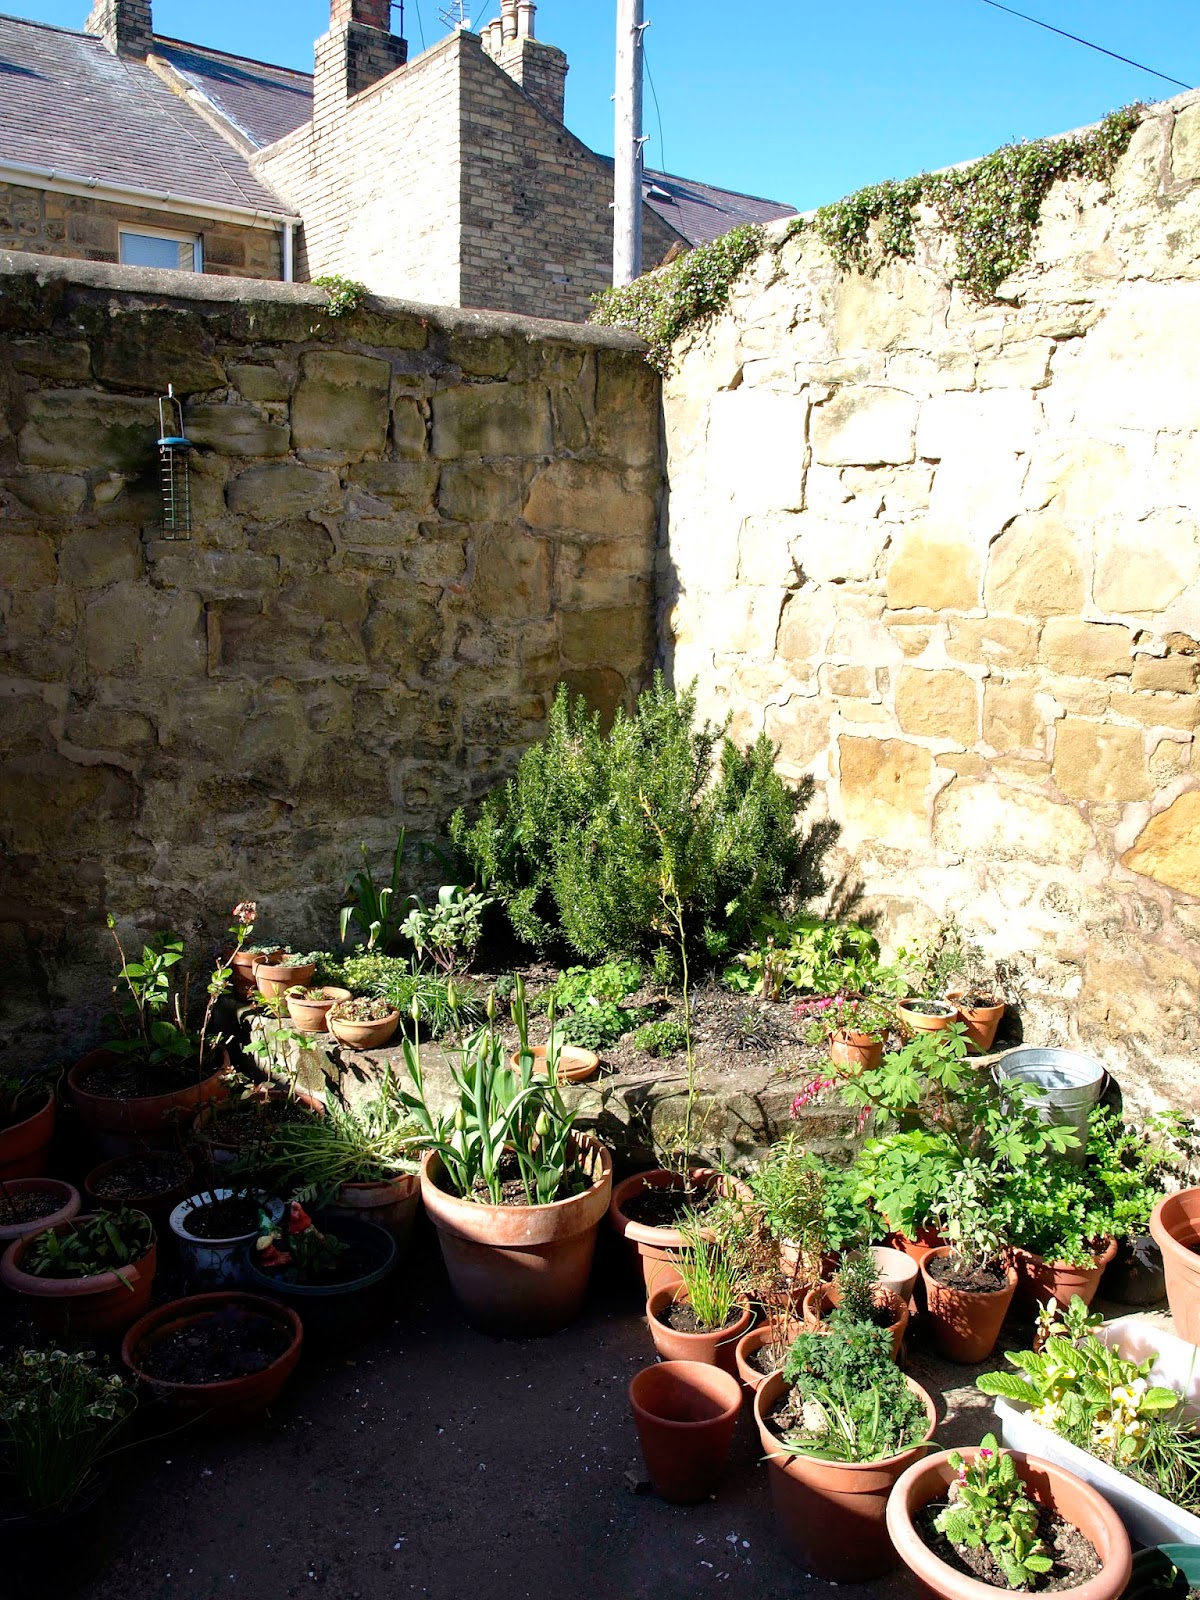
  • I have used many a lunch time in our yard soaking the sunshine. I love, love, love the fact that I can just go out of the kitchen yard and plant myself into a yard enjoying the plant pots and the one bed I have there.


My hanging basket plants are not very big, just planted them, ehm. Well, I am sure they will prettyfy (not a word, me thinks) my yard towards the end of the summer. I like to have a real "Secret Garden" gate in a stone wall.


The corner bed plants are filling the space. I might have to think of thinning them out.


 I do not have a big bloom feast here, but I love the different green textures of the leaves.


Look away, real gardeners! I am so inordinately proud of keeping this fuchsia alive over two winters. It will flower soon.


  •  My favourite piece of art at the moment is this mask situated in my kitchen, made by Elf Son.

  •  Happy news: I found an icon I thought was lost in our move. It is only 10cm tall, so not big at all and I have not been able to find it. Suddenly it was in a draw I thought I had used aplenty...weird and wonderful. The icon has sentimental value for me and I think is beautiful as well.

So that was the miscellaneous newsround from me. Hopefully back soon showing something more interesting! If I am not back before; Happy Summer Solstice!

Saturday, 24 May 2014

Extra TA-DAH for bathroom

We managed to hang the blind today and I decorated the window sill with a jar with shells.


So now we are really finished with the bathroom!

Bathroom Remake Ta-Dah!

 TA-DAH! Here it is. The bathroom. We used all the two weeks of our Easter Holidays to get it functioning and a bit of time each side of the holidays to prepare and do the last little bits. This was not a simple cosmetic revamp, but a total "rip everything out and put it back again" -job. And what's more, it was redoing bits that had been done badly. We had few hitches, but it was a learning experience and we now have a lovely working bathroom.

We did it in MOMO spirit - Modest Modern. Partly because we had a modest budget, but also because we did not feel that a full blown "luxury hotel suite"-style would have suited the house. Ours is a modest Victorian terrace and we wanted the bathroom to mirror it.

                      BEFORE                                                  

                     AFTER
 
The toilet has been changed to a normal, traditional white one instead of hugely wide beige throne. This has made cleaning around that corner easier, it was a really annoying job before.The little radiator with a towel rail above has been removed and replaced by heated ladder style radiator-towel rail. The walls are now white rather than magnolia-cream-something. The floor is essentially the same colour, although even the "before" floor was installed by us as an emergency measure instead of a smelly carpet.

                                                     BEFORE                                                                                                                       
   
                      AFTER
The bath was changed from a beige plastic monster to a plain white enamelled bath. The screen is now a folding one, which makes climbing into bath/shower easier. Before we practically had to stand in the toilet to make it. The mixed tiling was changed to one style, sand beige-grey big tiles and we did tile whole of the bath area.
Again the cleaning is SO much easier because I don't have to have my heart in the mouth while the screen is hanging outside the bath or banging against my legs and bottom in order to access the shower end of the bath. The old screen was actually not intact either and it was hanging wonkily. I had all sorts of ideas of having some natural pebble tiles, but realised that the amount of grout would mean that the cleaning would be a nightmare. Although the look might have been nice, I want to my everyday life be easy and simple.

                     BEFORE
                                                                 

                     AFTER  
 
The sink area was very dark and was fitted with a sink with a gap of 2mm between the sink and the wall. Why is that important? Well it's big enough to have muck gathering, but nigh impossible to clean. I leave the result for your imagination. The mirror was ok as such, but I was desperate to have space for all the tooth brushing stuff and such easily accessible, but hidden, so we bought a cabinet. I am now hopeful for the sink area to keep tidy. you can also see the patterned tiles in action. They are slightly lighter coloured in reality.


I bought a metal soap holder for the wall, but in the end didn't like how it fitted into the space. The walls surrounding the sink make it a bit tricky to dress this corner.At least we have a light fitting above the mirror cabinet. The soap dish was something I had already in the house. I filled it with some smooth pebbles, so the soap keeps dry. It works and looks nice.

                     BEFORE                                                                  


                     AFTER

The stand under the sink had a cupboard with two doors and a shelf. One of the doors actually came off, because the cabinet had been soaked due to the leak inside the wall. When I removed it, I also found a mushroom growing out of the cabinet wall. Charming! As the bathroom is narrow, I wanted draws under the sink to maximise the utilised space. IKEA had the most reasonably priced units. I was totally amazed what some firms were asking for similar cabinets. And no, the materials were no better... I also like that the sink is just a part of the moulded top. It makes it easy to clean. You should think I am obsessive about cleaning, but actually I don't like it, so anything which makes it easier/quicker is good in my book.

                     BEFORE                                                                       
 
 
                               AFTER


The old shower looks unusable in the picture, but in the reality, we had just taken the head off to use with our emergency shower arrangement. Our "luxury" was to buy a new shower with a nice big head and a separate hand shower utility. The only bad thing about it is that it is too good. Eh?!? We stand far too long under it as it is so lovely! We also have bath taps in the same end, so when in bath, nothing drips on your head. The bath taps are a modern take of Victorian taps, again very plain style. The good thing about them is that they are easily turned with toes.

If you peek on the right of the picture above, you can see that the door glass is covered by a blind inside. It was an ok idea, but I found the blind looking really out of place, heavy and big on the door, so did not want to replace it with a new one. Instead I went for a granny option; a curtain wire and a curtain made of a lovely vintage table cloth. I am so happy to have found use for this piece of loveliness in my house. It looks sweet from both in and outside. This is how it looks from the hallway, coming up the stairs:


Yes, the hallway and the stairs are our next project. As this is my favourite door at the moment I need to show you the effect closer by:


I love it! It's like a fine old lady and makes me smile every time I see it.

Well done if you made it to the end of my bathroom report. Anyone else having a show and tell of bathrooms? Leave a link if you have, I would love to see!

Wednesday, 21 May 2014

Tinga Tinga inspired Cushion Covers


This happens to me nearly every year. My sister-in-law's birthday creeps on me and suddenly it is the day before. True to the tradition I was up early to finish off her present in order to put it in post and hope for the best. In most cases I ask her what she would like to have. She is very obliging to wish for handmade things. As you might know, I am not much for buying things. I hope there is still scope for a few years of presents and surely then we can start from the beginning as the first ones wear down...

This time she asked for a cushion cover for her sofa. Of course I can only make these things in pairs, so she was gifted with two. She said that she would like to have reds, oranges, maybe pinks and even blue. Now I know that the picture hanging in her living room is very similar to this with a bit of pink instead of blue and it was a sort of "known" point in the scheme.

I made the bird cushion using the painting loosely as a model for my bird.


We have another Tinga Tinga painting which I used as a starting point for the beast. I didn't go an see the painting, just used my memory of it in order to let my own imagination work. I think I achieved the same as the painting; you cannot really tell whether the beast is a leopard or hyena or maybe a spirit animal.


For the edges and backing I used some lovely handmade batik from Tanzania. I had this in my stash and although I did not need to, I decided to patchwork it to add a "folky" touch. I also wanted to do the top-stitching in the colour of the background in the middle.

The animals were machine stitched onto the background, without bondaweb or such. I then hand embroidered the embellishing. The bird has some recycled beads on it. Bear with me while I am drowning you with my pictures!


Happy Birthday S!

Tuesday, 13 May 2014

Wind Surfing Elf Son


Elf Son has long been looking for a sport he would enjoy. There is not that huge selection available locally and many boys like their football. Elf Son has specific problems both with his spatial awareness and gross motor skills as so many others with Asperger's syndrome. Team sports are thus out. We have been talking about wind surfing over the winter and he was willing to have a go at it. This month was time to test it and he loved it. It is still a challenge, quite a lot more for him than for people who can coordinate their limbs without difficulty.

I am so proud of him and his staying power. Last week on Wednesday night it was both raining and blowing at wind force 5. He struggled with all the other beginners and even the more skilled ones had their problems. The wind was gusty and there were white horses on the lake. He did not get much surfing done, but it was still a good exercise in balance!

Have you ever tried wind surfing? I am rather tempted, but admit that with age I have become quite ridiculously intolerant of cold water. As a child I used to swim and play in lakes for hours. I remember my grandmother shouting from the shore that I should come up or I would get urinary infection. As it happens,  I never did!

Saturday, 10 May 2014

Allotment Allure

That is SO hard to resist. I think I might sleep there if I could. There is not much to show as yet, nothing much growing.  I have made great big inroads in clearing the main growing space and have planted my potatoes and onions as well as sown carrots, beetroot, turnips, spring onions and an assortment of leaves and herbs.

Mint and chives. I cleared the bit to the left of this bed today and sowed dill there. Left some space for both parsley and coriander seedlings growing in the greenhouse at the moment.
 This week we also took a delivery of raspberry canes, black currants and strawberry plants. I could have moved some of my old strawberries, but decided to take the chance to plant some older and tastier varieties. This means that our allotment won't be producing any berries this year, but we should have some next summer.

The area around the hut/greenhouse is a mess and will be done slowly during the summer. I also have hopes up to erect a new polytunnel, quite similar in size and design to my last one.

On one side my neighbours have a great big building full of racing pigeons. They get their exercise over the gardens and it is a very special sound when a flock of them flies just overhead. They don't eat from the allotments as they are well fed. It is their wild cousins, who tend to decimate any kales they can spot.They coo very cosily while I am gardening.

If you strain your eyes you might see the long thin green asparagus. They are one-year old crowns, so still far away from being eaten. Behind them are my baby strawberry plants. The building in the background is the pigeon coop.
 I think I might be a bit of an exotic animal amongst my immediate neighbours. It is hard to tell quite yet, as the plants are small or not even started, but I have a feeling that all my neighbours are very traditional growers. They plant their tatties, carrots, beets and cabbage and put maybe beans and peas in as well. I have already things like asparagus and globe artichokes growing. (Both moved with me) and they have been pointed out and wondered about, hehe.

This is our pea fence. The black fence was on the allotment, but was not built with much timber, so we bought some posts and horizontals. I am so excited by this one!

You can see a single globe artichoke on the right against the black fence. I think I have eight plants altogether.


Well done if you read all the way here. I write these postings very much for myself to remember what I have done and when. How is your garden growing? Leave a link if you have pictures, it would be lovely to see!

Wednesday, 7 May 2014

Painting Naturally

Helloooo! After having disappeared into a plughole I then metamorphosed into a mole to dig the allotment. It looks far better now, although I am still behind and need every minute of the day to run the house/work/decorate/garden. Cleaning and such has to wait, I hope my family won't find this too disgusting.

 In our renovation, we have aimed at using the environmentally and human friendly paints and surface treatments where possible. In my latest foray on the net I have found even more manufacturers. My focus has been partially on the care I want to give us, living in the indoor climate we create and partly on the manufacturing in this country. So, my list is again quite UK biased, with a good reason behind it.

In the latter years the EU has tightened the VOC (volatile Organic Compounds) rules for the paints. This has lead to an improvement on this account of many mainstream brands. It's not by any means the only thing , which counts. Many of the big makes market their paints as "green" although I would look closer, before I believe.

Also a paint manufacturer, who might use linseed oil in the paint, would actually rack up some VOC count. So everything is not as plain as it seems. There are a lot of other factors, which I am not going to go into, but will tell you what my experiences are. There is an excellent article about the ins and outs with a list of manufacturers and suppliers here.

We used "Nature Paints" for our walls last summer. They come in powder form and are clay based, tinted with the finest colour tints available. They are relatively easy to use and it is delightful that the component, which is easily available ie. water has been left for the user to add. The production of the paints is located 20 miles from the clay pit, where the main ingredient comes from.


Like the blurp says: You can sleep immediately after painting in the room, you could sleep while painting, if you wish. This is a paint, which you could smear on the walls without a twinge for your soul while your baby was napping in the same room.

This paint does not need a primer and can be used on wood as well. We painted a newly plastered living room with this  and had to use 2-3 coats. I think we could have done with only two, had I not allowed the Husband to paint! Anyway, the paint wasn't just sucked into the fresh plaster, which I have heard can be a problem. (It could also be the skill of our plasterer, he left the surface just right, polished enough for not being thirsty, but not so polished that paint wouldn't hang there). EDIT: I have now used it in a wall I plastered, very amateurishly, and it still doesn't so the disappearance act.

Cons: Well, it takes some effort to mix it. If you buy one of those mixing bits for your drill, you should be laughing. I made do with a hand mixer from my kitchen. Totally doable, just a bit slower. You have to use the paint you have mixed in a week. It does not have any preservatives, so will go off. On the other hand the extra powder is easy to store. Again no water, no trouble. Also the paint has a clay smell. It takes some time to disappear. It is not unpleasant, just earthy.

When it has been painted and has cured for two weeks, it is hard to tell any difference to a bog standard emulsion. (Actually could not tell after the painting either). I would hazard a guess that an emulsion could withstand more rubbing with an abrasive sponge, but I have removed stains from our walls without a problem. (And equally had paint come off, when a wall was painted with a "normal" kitchen emulsion).  I would definitely recommend this brand.

For our bathroom I chose another excellent British paint called Ecos. They have a largish selection of colours and can even colour match for you, if you wish. Their selection includes both normal emulsions, bathroom and kitchen eggshell, wood paint and outside wood treatment products. (And many more). Their website is well worth visiting.


I found that their printed colour chart was more accurate than Nature Paint's. Both places send tester pots/envelopes and I always use this service as it is difficult really to see how the colour will work before you have tried it in situ. Nature paint also allows you three paint chips with every order. They are bits of card with the actual paint on them, so as accurate colour rendition as you would get.


The paint was like any other paint to work with, maybe a bit easier, as it is not as thick as some of the modern paints. The 5-litre pot comes with a fastening ring, so no need for screwdrivers to open the lid. Oh, there was one difference; it does not smell. At. All. BLISS! Another after-thought here: The smell is no indicator for the harmfulness of the paint; a paint can be odourless, but still fill the air with harmful chemicals. Likewise an eco-paint can be smelly, but won't harm you. All three of us are quite smell sensitive, so Ecos Paint being odourless was a great bonus.


Wednesday, 23 April 2014

Greetings from the plughole and Cast Iron Love


 As I warned you, I did disappear into a plughole. The bathroom is almost done, some decorating needs still happen, but as we can use it, I have taken a bit time off to dig in the allotment. The lovely neighbour, hereafter known as the Gnome (garden variety), had been turning some of our soil for us. I saw him this morning and he admitted that it was because he was bored! I must say that his side is impeccable and nothing much can be done before the soil is warm enough to plant seeds into. Here in the northern England we are always a few weeks behind the warmer South.

The picture above is a teaser, a little bit of our spanking new bathroom. The rest will come, when we are finished properly.

On a kitchen note, I love, love, love cast iron pans. I have two; one we bought twelve years ago; a massive 28cm diameter one and a smaller one my parents bought to us from Finland. I wished for this specific, smaller size and a metal handle, so we can put the pan into the oven as well. The task wasn't easy, most this size pans tend to have a wooden handle. In the end this pan was found second-hand. Awesome! My Dad had given it a new oil treatment and it is as good as new. These pans will likely survive us.


The only downside is that they are heavy. At the moment we are fine with this, but if we get very weak at some time in the future they will be handed down to the next generation. In addition we also have a pot:


We would like to have bread tins made of cast iron as they cook the bread beautifully. Elf Husband has tried it in our pot and although it makes a nice rustic loaf, we only have one of them and the shape is not very handy for lunch packs. At the moment they are available in the US only. Sigh....I cannot read Polish or other Eastern European languages, so don't know whether they make some. Anyone out there, who knows? This is out of assumption that those countries might still make this old fashioned cookware. By the way, I am not interested in Le Creuset or alike, because they are enamelled. That in my mind totally does away with all wonderfulness of a cast iron cookware. The whole point is that they cannot be destroyed. The enamelling makes them vulnerable for scratching.

If you think that you can destroy a cast iron pan by washing it in soapy water, you are wrong. You might put it out of commission until it is re-primed. Here is the way you do it, if you need instructions to revive an old pot or pan. Do you have any cast iron favourites?

As the kitchen was the main work place for cutting tiles etc. it ended up very dirty. This forced me into a spring cleaning and as a treat after hard work I painted a bit of wooden dowel in black and hung some hooks to make a rack for some kitchen implements.


Monday, 14 April 2014

Gardening bliss


 is what I experienced when the first really warm week hit us in the beginning of March. The warm weather then promptly disappeared, as you might expect at our latitudes. I went on work with this untidy bush (picture from the last summer):


and turned it into this:


Better suited for a small yard and giving some space for my beloved herbs.

I moved here from a far bigger garden and took me a selection of perennials and some herbs as you can see from the sea of pots. 


We also got ourselves on the Allotment Society waiting list. People we know waited a bit over a year when they got theirs, so I was thinking that if I was as lucky, we would get one in the back of this coming summer. Surprisingly, the gardening stars aligned for us and we got our allotment on Sunday!

The allotment has some weeds, but I would say that it is in an easy category. The soil is beautiful, totally different kettle of fish from my old garden. I had a feel of it and saw some over wintered root veg and it is promising great yields!

The neighbour allotmenteer, whose nephew had ours, cleaned it for handover in January.


The people who it was offered to obviously didn't turn up, so we got it! (We must have been next ones on the list). By the way, the neighbour is a really lovely, retired gent, who immediately offered his gardening tools for our use, while he is not there using them. He also showed us around in his sheds and in his heated green house, where the tomato plants were almost a foot tall already! You can see his tidy allotment on the left side of the path.

There is an amount of junk, which we need to get rid of. Amongst it a corrugated roofing sheet made of asbestos, which needs to be collected by the council. On the other hand there is a little potting shed cum green house:


All the allotment pictures are Elf Husband's. He also took one from the alley in the allotment. It looks like a shanty town and today someone was burning wood somewhere, so both visual and olfactory inputs lead us directly back to Africa. We share a gate with our neighbour allotmenteer. If you are not from the UK, this is how allotments often look like here; they are very much make do with what you can get for free or very cheaply.


Friday, 4 April 2014

Bathroom renovation day -1

We start officially tomorrow, but actually have done some preparatory stuff during this week.
This is how our delightful bathroom looked like:


Yes, there is a hole in the wall. We had to make it to investigate a leakage. This then led to stopping water going into our shower as the water was leaking inside the wall. The construction of this wall could be an example in a book of "How not to renovate your bathroom".

Husband took the shower screen and the wall down. (We will install new ones, the lay-out is the only possible for this room, if we want to have a shower and the bath.


Today he also peeled all the tiles off. We will have our last "splush" in this bath tomorrow morning and then all the sanitaryware is taken out.

We got most of the deliveries yesterday, but the sink area tiles arrived this morning. They are SO pretty. I had to play a little bit by making a pattern:


I love them, so excited to have them on my walls. I will try to keep blogging, but if there is a bit of a pause, I have temporarily disappeared into a plughole.